Have you ever wanted students to be able to self-enrol in a Moodle course? Let us take you through a step by step on how to enable self-enrolment in Moodle.
1) Click Course administration
2) Click Users
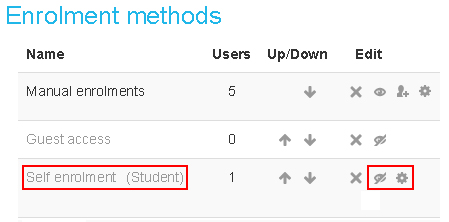
3) Click Enrolment methods

4) Click on the words Enrolment methods and you will see that Self enrolment (Student) is disabled
5) Click on the closed eye button to enable Self enrolment feature

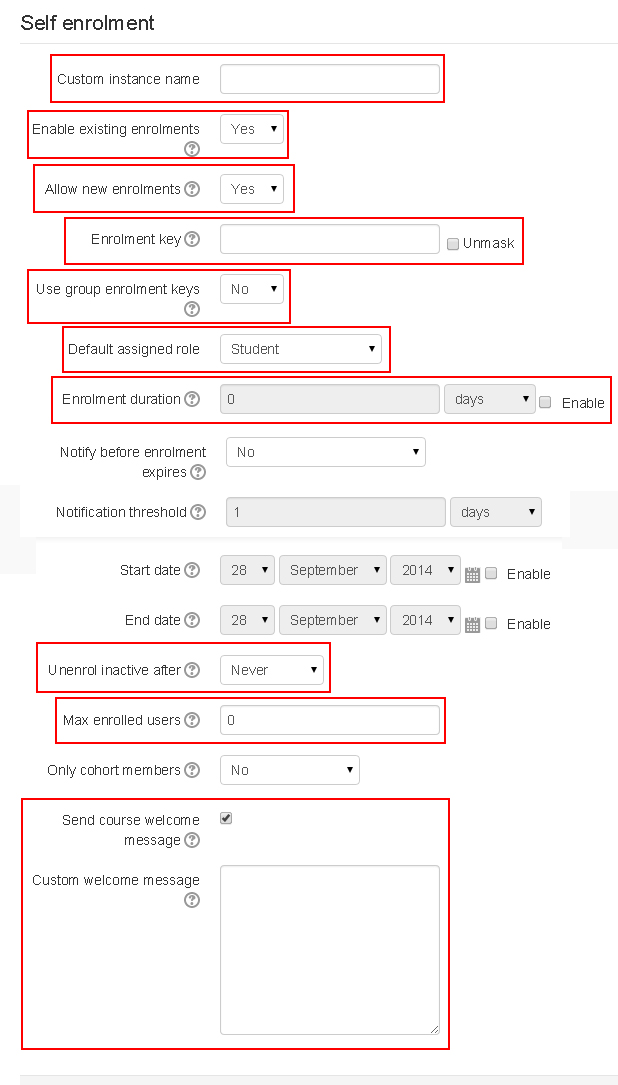
6) Click the Edit button to change the Settings of the Self Enrolment. Below outlines key fields you should be aware of:
a) Custom instance name – changes the default name from Self enrolment (Student) to a chosen name
b) Enable existing enrolments – if disabled all existing self enrolments are suspended and new users can not enrol.
c) Allow new enrolments – this setting determines whether a user can enrol into the course.
d) Enrolment key – an enrolment key enables access to the course to be restricted to only those who know the key. If the field is left blank, any user may enrol in the course. If an enrolment key is specified, any user attempting to enrol in the course will be required to supply the key
e) Use group enrolment keys – means users are automatically added to the group when they enrol in the course.
f) Default assigned role – the default role for those self-enrolling is student, this can be changed if required
g) Enrolment duration – this is the length of time that the enrolment is valid (weeks, days, hours, minutes etc) If disabled, the enrolment duration will be unlimited.
h) Unenrol inactive after – defines whether users are automatically unenrolled after being inactive for a certain period of time
i) Max enrolled users – defines the maximum numbers of spaces in the course. Setting it to 0 means there are unlimited spaces
j) Send course welcome message – allows you to choose whether a welcome message is sent when students enrol
k) Custom welcome message – allows you to create your own welcome message. If you leave this blank the default welcome message will be sent
7) Click Save Changes


Recent Comments